March 30, 1979
Two EDIT subcommands, CHANGE and1, result in lines being copied in
the user input area. In the case of the CHANGE subcommand, the line that
is displayed is the current line.Once in the user input area, you can
modify it and re-enter it.While you are changing it, the original line
appears unchanged in the output display area. If you decide that you do
not want changes entered, you must press the Erase Input key and then
press the Enter key before you enter any other EDIT subcommands.You can use the ? subcommand to request that the last EDIT subcommand
you entered be displayed in the user input area. If, for example, you
enter a CHANGE orLOCATE subcommand that results in a NOT FOUND condition, or some other error, you can enter: 1 and modify the subcommand line and re-enter it, if you want; otherwise,
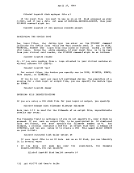
use the Erase Input key to delete it.CONTROLLING THE DISPLAY SCREEN Usually the editor controls the entire screen display during an edit
session. Occasionally, the screen goes into aMORE... status, and you
must use the Cancel key orPA2 key to clear the screen. There are two
other situations in which the screen must be cleared, either by the
editor, orty you. When you use the CMS subcommand to enter CMS subset
to enterCMS commands, the screen is cleared and the message CMS SUBSET is displayed at the top of the screen. When you issue the subcommand RETURN to return to edit mode, the screen dis Flay is restored to its
original appearance.
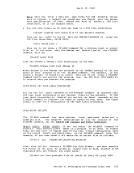
The situation is slightly different, however, whenever you
communicate with the control program(CP), or receive messages from other users during an edit session. Any CP message or command response
causes your screen to go into aMORE ••• status; you must use the PA2 (Cancel) key to see the response. To restore your screen to its edit
display, you should use the EDIT subcommandTYPE. If you use the PA1 key to place your virtual machine in the CP environment, and the screen
status area indicatesCP READ, use the CP command BEGIN to restore edit mode. Then enter the TYPE subcommand. If you enter a subcommand other
thanTYPE, the entire screen is not restored, and the top two lines (the
editor's data and response fields)may contain lines of the CP response.
If your virtual machine was in input mode when you entered theCP command, you may continue entering lines of input; the third through the
ninth lines of the screen are restored after you enter the next line.
If you enter aCP command that does not produce a response, then
there is no change to the screen.
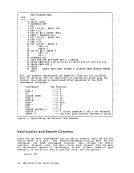
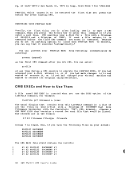
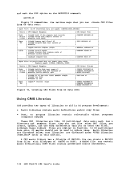
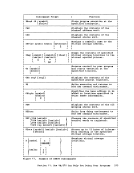
TheVERIFY subcommand allows you to alter the verification columns when
you are editing a file or to cancel verification altogether. If, for
example, you are editing a file with records longer than80 characters,
each line is displayed on two lines of the display screen. Sometimes,
you may be editing only specific columns in a file,and do not need to
see the lines displayed in their entirety. To see only the first80 columns, you could enter:
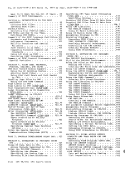
346IBM VM/370 CMS User's Guide
Two EDIT subcommands, CHANGE and
the user input area. In the case of the CHANGE subcommand, the line that
is displayed is the current line.
modify it and re-enter it.
appears unchanged in the output display area. If you decide that you do
not want changes entered, you must press the Erase Input key and then
press the Enter key before you enter any other EDIT subcommands.
you entered be displayed in the user input area. If, for example, you
enter a CHANGE or
use the Erase Input key to delete it.
session. Occasionally, the screen goes into a
must use the Cancel key or
other situations in which the screen must be cleared, either by the
editor, or
to enter
original appearance.
The situation is slightly different, however, whenever you
communicate with the control program
causes your screen to go into a
display, you should use the EDIT subcommand
status area indicates
than
editor's data and response fields)
If your virtual machine was in input mode when you entered the
ninth lines of the screen are restored after you enter the next line.
If you enter a
there is no change to the screen.
The
you are editing a file or to cancel verification altogether. If, for
example, you are editing a file with records longer than
each line is displayed on two lines of the display screen. Sometimes,
you may be editing only specific columns in a file,
see the lines displayed in their entirety. To see only the first
346