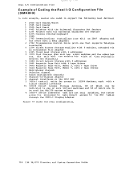
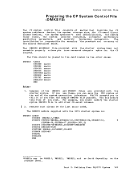
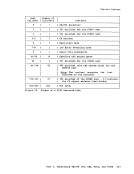
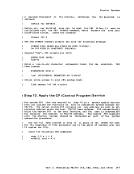
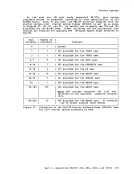
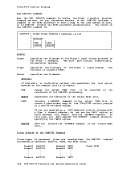
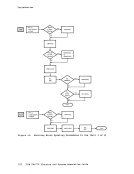
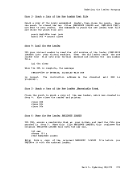
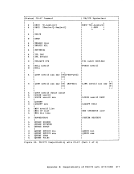
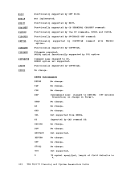
Page of GC20-1801-10 As Updated April 1, 1981 by TNL GN25-0837 Updating CMS Updating eMS The procedures for updating are the
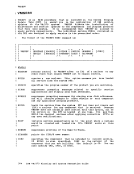
same as for updatingCPa The order of search for CMS updates is:
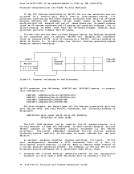
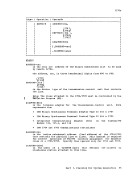
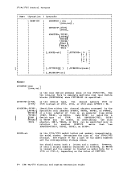
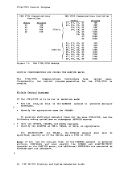
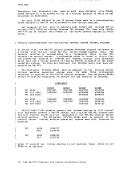
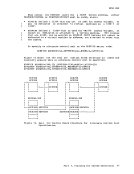
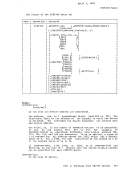
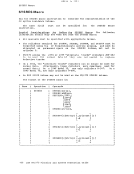
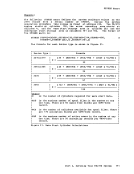
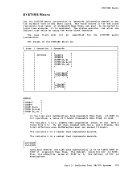
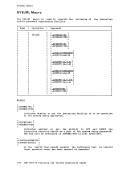
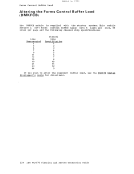
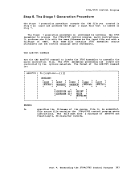
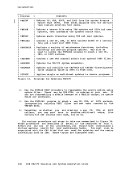
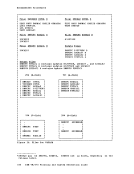
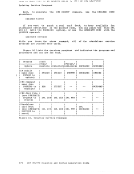
191 AR/i 193 BIA RIO 190 CIA RIO 393 D/A PIO where 193 con tains PTFS, control files, and user updated TEXT decks and
393 contains theeMS source 190 contains the current eMS system,
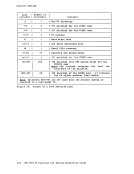
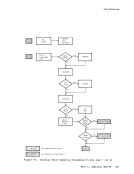
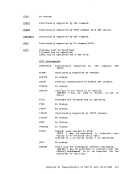
including text decks, command modules, and theCMS nucleus. You might use the following steps when you update CMS: 1. Format the minidisk you are going to use to test the CMS nucleus,
if any.Use the VMFLOAD program to punch the updated eMS object modules.
3. Regenerateany disk-resident modules that have been updated. 4. Load the new CMS nucleus.
5.Save the CMSSEG discontiguous shared segment and the new eMS should be resaved whenever the S-disk is
updated. This will insure that the savedCMS system reflects the
physical system.
The exact steps that you take depend on whether you are testing theCMS nucleus before you load it onto the system disk, whether you are
using shared segments, and so on.
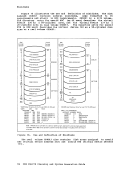
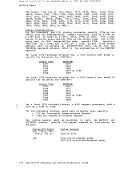
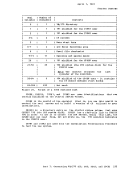
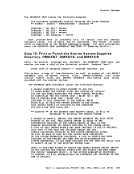
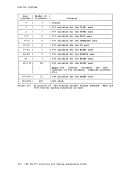
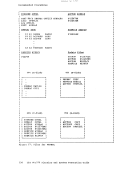
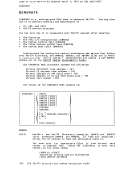
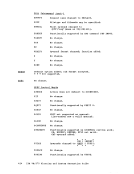
Disks for UpdatingeMS If you want to keep eMS source files on disk, the minidisk you use must
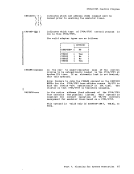
be at least 145 cylinders for a 2314 (or 2319),80 cylinders for a 3330 disk, 190 cylinders for a 3340 disk, or 40 cylinders for a 3350 disk.
Then, you should have theeMS source tape mounted and attached to the
virtual machine, and issue the following commands to load the source
programs onto theeMS disk:
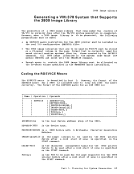
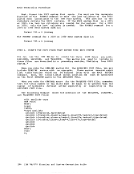
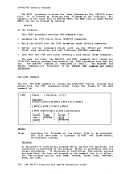
vmfplc2 fsf
vmfplc2 load (eof 2)
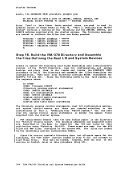
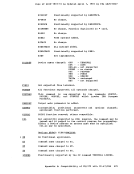
If you want to test thenew eMS nucleus in a virtual machine before
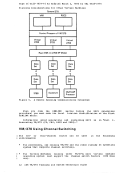
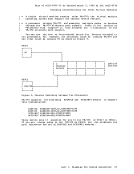
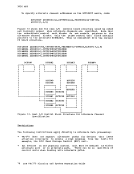
you update the realeMS system, you should have a disk available for a
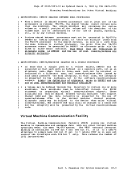
copy of the nucleus. The configurationshown for MAINT in "A Virtual Machine for Updating VM/370" shows a 6-cylinder minidisk at virtual
address390 for testing the eMS nucleus. You can test updated disk-resident CMS modules on your A-disk before
moving them to theeMS system disk (190). Part 5. Updating VM/370 349
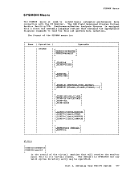
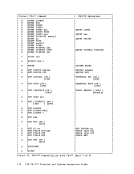
same as for updating
191 A
393 contains the
including text decks, command modules, and the
if any.
3. Regenerate
5.
updated. This will insure that the saved
physical system.
The exact steps that you take depend on whether you are testing the
using shared segments, and so on.
Disks for Updating
be at least 145 cylinders for a 2314 (or 2319),
Then, you should have the
virtual machine, and issue the following commands to load the source
programs onto the
vmfplc2 fsf
vmfplc2 load (eof 2)
If you want to test the
you update the real
copy of the nucleus. The configuration
address
moving them to the