Starter Systems Enter the following command:
define nnn as 131 Where nnn is 350, 351, 352, or 353. Starter System Residence Device Type System Device Type 2314 3330 3340 3350 2314 350 351 352 3.53 3330 351 350 352 353 33LJO 351 352 350 J...., 3350 351 352 353 350 Procedure 2
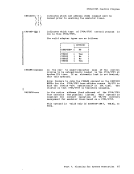
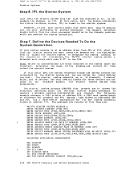
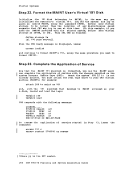
If you did not label your system residence volume as VMRELn, you must
attach the volume to your virtual machine now. Enter:
attach 131 to cpgen as 131
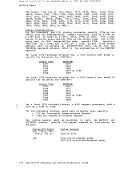
Note: The first device address you specify in the ATTACH command is
for the real device; the second device address is for the virtual
device. The real 131 is the system residence volume you formatted in Step 2. The virtual 131 is the system residence device you defined
in DftKSYS (using the SYSRES macro instruction). The system residence
device was also entered in response to the message:
ENTER DEVICE ADDRESS WHERE SYSTEM RESIDENCE WILL BE BUILT (CUU): Step 10. Make Other Devices Available You must attach your tape drives and designate the printer to receive
abnormal termination dumps if they occur. Use the explanation that
follows to decide how to do this. Press the Request key before entering
each command, for example:
attach 280 to cpgen as 181
attach 281 to cpgen as 182
set dump OOe In the first command, the real tape drive (280) attached must be the
same real address you entered in Step 7 in response to the message: ENTER ADDRESS WHERE STARTER SYSTEe TAPE IS (CUU): This real device must be attached to CPGEN as 181, because the VMSERV EXEC procedure (which is used later) expects it to be 181. Mount your
system PUT on this tape drive for Step 13. Part 3. Generating V"/370 (CP, CftS, RSCS, and IPCS) 239
Starter Systems In the second command, the real tape drive (281) attached must be the
same real address you entered in Step 1 in response to the message: ENTER ADDRESS WHERE SCRATCH TAPE IS MOUNTED (CUU): This real device must be attached to CPGEN as 182, because the GENERATE EXEC procedure (which is used later) expects the scratch tape to be
mounted on 182.
If only one tape drive is available, enter
attach 280 to cpgen as 181 You can define your virtual 181 as 182 later in the system generation
procedure.
The address of the real printer, defined in Step 1, is OOE. Any
system dumps that occur are directed to that address.
If you vish, you can issue the CP query virtual all
before and after performing Step 10, to see how your virtual machine's
configuration chanqes.
Step 11. Load eMS
Load CftS from virtual address 190 by issuing the CP command: ipl 190 parm seg=null You are loading a CftS nucleus without a shared segment and can expect
an error message stating that the segment specified is invalid. After CftS is loaded, a message is displayed on the system console indicating
that CftS has successfully loaded: CMS VERSION n.n mm/dd/yy hh ••• Press the ENTER key (END key on a 3215) so that the CPGEN 191
minidisk is accessed as your A-disk.
Step 12. Define and Format A
Temporary Minidisk
In Step 2 you allocated TDSK space on your system residence volume. In
order to be able to assemble files (DMKRIO, DMKSYS, DMKSNT, DMKFCB) later, you have to define a temporary minidisk. Issue the command:
define txxxx 192 yy wh ere: xxxx is the device type of your system residence volume (2314, 3330, 3340, or 3350) Y1 is: 20 if xxxx is 2314 11 if xxxx is 3330 25 if xxxx is 3340 5 if xxxx is 3350 240 IBM 'M/310 Planning and System Generation Guide
Previous Page Next Page