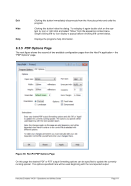
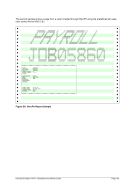
The changes made on this page are only temporary and will be discarded when HercPrt exits or a new
control file with different options is opened. To make this changes permanent you must manually edit the
job separator control file and enter the changes there.
Please note that the options “Feedholes”, “Compression” and “Columns”, as well as all those related to
the “Green Bar” are not supported for RTF but only to PDF files.
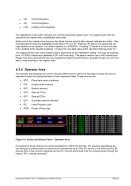
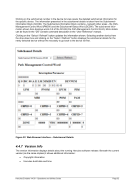
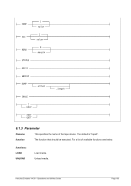
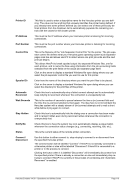
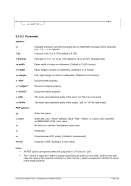
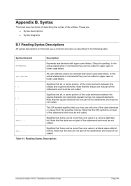
Paper Size
This drop down allows to choose one of several predefined paper sizes. The pre-
defined paper sizes are US Fan Fold, US Compact Fan Fold, US Letter, ISO A3,
ISO A4, ISO B4, ISO B4 Extra and ISO C3.
Paper Width
Enter here the desired custom form width in either fractional inches (the default) or
whole millimetres. To specify millimetres append ‘mm’ to the size (e.g. ‘210mm’).
Paper Height
Enter here the desired custom form height in either fractional inches (the default) or
whole millimetres. To specify millimetres append ‘mm’ to the size (e.g. ‘297mm’).
Green Bar
This dropdown is to select the desired “green bar” colour or a custom colour using
the #RRGGBB format. Chose ‘No’ for no green bar or ‘Outline’ for an uncoloured
“transparent” green bar.
Note: The green bar option is ignored for RTF output.
Orientation
Choose the desired paper orientation, either portrait or landscape.
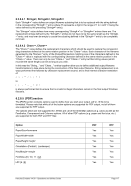
Font Size
Use this dropdown to choose the desired font size from the list of available sizes.
Available font sizes are 9pt, 10pt, 11pt and 12pt. Any size may be used for reports
printed at 6 LPI, but the 9pt font size is forced for reports printed at 8 LPI.
The font itself is always “Courier New” and cannot be changed.
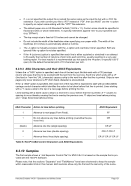
Lines per Inch
The default line spacing is 6 lines per inch. If you choose to print your report at 8
LPI then the 9pt font size is forced.
Columns
To squeeze long print lines onto narrow forms or stretch short print lines to fill wider
forms enter here the number of columns you want to be able to fit onto your custom
sized form.
The recommended default value of zero uses the normal default pitch of 10 charac-
ters (columns) per inch.
Note: The columns option is ignored for RTF output.
Horizontal
Margin
Specifies how far from the left edge of the form (not including the feed holes) you
wish each print line to start.
When the output is PDF the same value is also used as the right margin and print
lines are prevented from printing beond it.
When the output is RTF however, the value is only used as a left margin; the right
margin is always set to zero and any print lines which would otherwise extend
beyond the far right edge of the form are instead automatically wrapped onto the
next line.
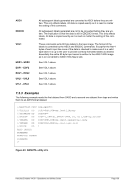
Feed Holes
Select this option to cause a realistic looking set of tractor-feed holes to be drawn
along the left and right sides of the report.
Note: The feed holes option is ignored for RTF output.
Compressed
Produces standard compressed PDF files instead of legacy uncompressed ones,