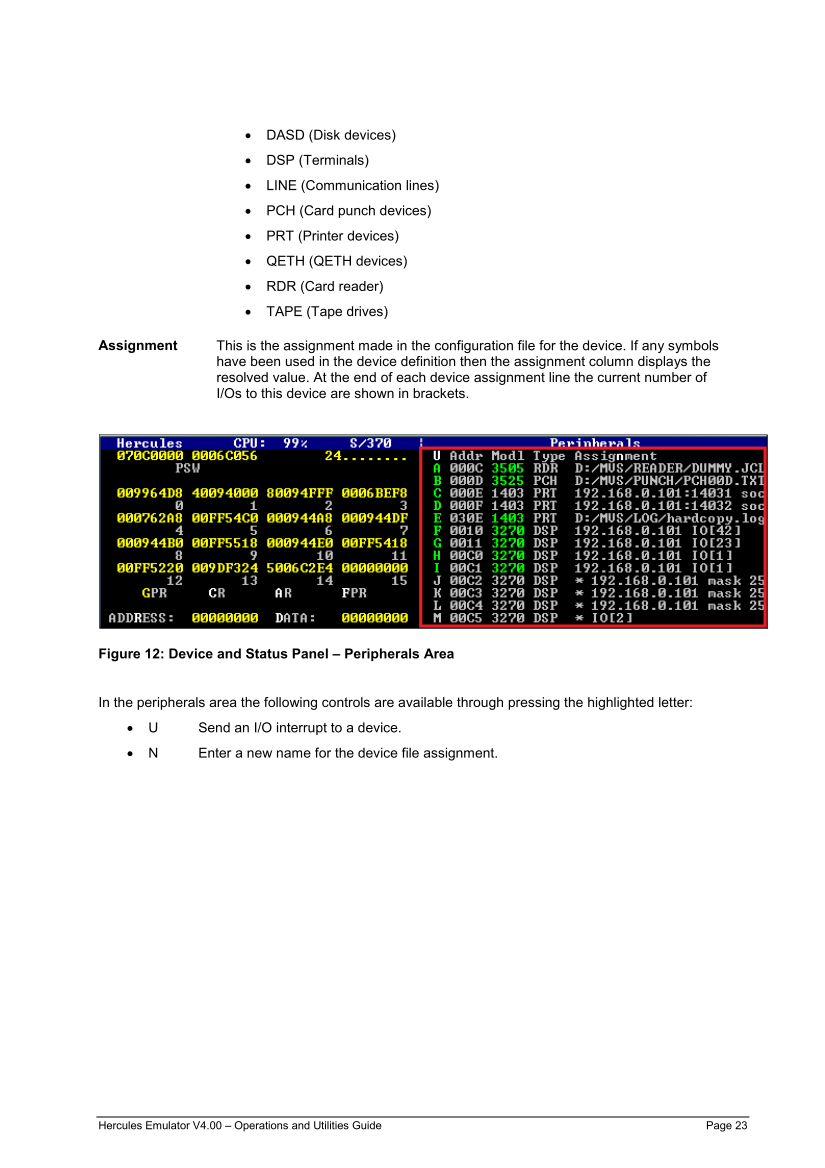
DASD (Disk devices) DSP (Terminals) LINE (Communication lines) PCH (Card punch devices) PRT (Printer devices) QETH (QETH devices) RDR (Card reader) TAPE (Tape drives)

Assignment

This is the assignment made in the configuration file for the device. If any symbols
have been used in the device definition then the assignment column displays the
resolved value. At the end of each device assignment line the current number of
I/Os to this device are shown in brackets.

Figure 12: Device and Status Panel Peripherals Area

In the peripherals area the following controls are available through pressing the highlighted letter:

U Send an I/O interrupt to a device. N Enter a new name for the device file assignment.

4.4 The Web Browser Interface

Hercules can also be accessed through a web interface in addition to the application panels. This allows
operating the emulator from a totally different machine than it is running on. The web server component is
activated through HTTP statements in the configuration file or HTTP console commands (consult the
“User Reference” manual for details on how to activate the built in web server). To access the web
browser interface, start a web browser pointing to the machine where Hercules is running on. The URL is
dependent on the port chosen on the HTTP statement to activate the web server:

http://ip_address (port = 80)

http://ip_adress:port (port <> 80)

If Hercules is running on the same machine as the web browser, then “localhost” can be used instead of
the IP-address. Some valid examples to connect to the web server:


http://192.168.0.199

http://10.0.0.1:8080

http://localhost

http://localhost:8081


If logon security is enabled in the HTTP statement (through the AUTH parameter) then the user is first
prompted to enter a user name and a password before to be able to connect to the web server. Please
note that the user name and password necessary to access the web server are sent in an unsecure man-
ner to the web server (no HTTPS is used) and are not saved encrypted in the configuration file.

Figure 13: Web Browser Interface Logon

After accessing the web server the main screen of the web interface is presented. The web browser
window is divided in three areas: the navigation area on the left, an operator area on top of the window
(similar to the area in the device and status panel) and a display area.

Previous Page Next Page