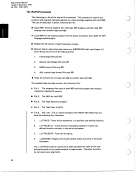
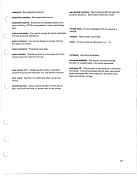
Auxiliary Tape Unit Installation Procedure
0 1. Set the 5100 and auxiliary tape unit power switches to OFF.
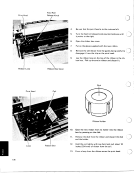
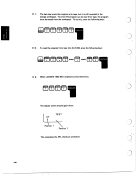
17 2. Remove the shipping tape from the signal cable (flat cable) and connect the
signal cable into the back of the 5100. Make sure the connector fits squarely.
Turn the knob in a clockwise direction until the connectors fit together firmly:
0 3.
0 4.
0 5.
0 6.
I 196
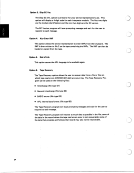
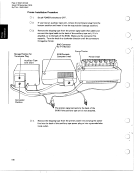
Power Line Plugs
Check that the terminator plug is in place on the rear panel as shown in the
preceding diagram.
Remove the shipping tape from the power line and plug the power line into
a grounded electrical outlet.
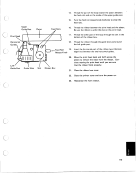
Set the auxiliary tape unit POWER switch to ON, and be sure that the fan
is operating.
a. If your location is not too noisy, you should hear the fan motor operating.
b. If you are not sure, hold a light piece of paper near the air intake on the
left side of the tape unit. The loose end of the paper should be pulled
toward the tape unit.
If the fan does not appear to be
operating, check your power outlet. If it is
OK, set the POWER switch to OFF and call for service, Do not continue with
these instructions.
Set the 5100 POWER switch to ON and continue to the checkout procedure.
3
(>
iJ)' '\
I
0 1. Set the 5100 and auxiliary tape unit power switches to OFF.
17 2. Remove the shipping tape from the signal cable (flat cable) and connect the
signal cable into the back of the 5100. Make sure the connector fits squarely.
Turn the knob in a clockwise direction until the connectors fit together firmly:
0 3.
0 4.
0 5.
0 6.
I 196
Power Line Plugs
Check that the terminator plug is in place on the rear panel as shown in the
preceding diagram.
Remove the shipping tape from the power line and plug the power line into
a grounded electrical outlet.
Set the auxiliary tape unit POWER switch to ON, and be sure that the fan
is operating.
a. If your location is not too noisy, you should hear the fan motor operating.
b. If you are not sure, hold a light piece of paper near the air intake on the
left side of the tape unit. The loose end of the paper should be pulled
toward the tape unit.
If the fan does not appear to be
operating, check your power outlet. If it is
OK, set the POWER switch to OFF and call for service, Do not continue with
these instructions.
Set the 5100 POWER switch to ON and continue to the checkout procedure.
3
(>
iJ)' '\
I